 EN
EN
 AR
AR
 BG
BG
 HR
HR
 DA
DA
 NL
NL
 FR
FR
 DE
DE
 EL
EL
 HI
HI
 IT
IT
 JA
JA
 KO
KO
 PT
PT
 RU
RU
 ES
ES
 SV
SV
 TL
TL
 ID
ID
 SR
SR
 SK
SK
 UK
UK
 VI
VI
 ET
ET
 HU
HU
 TH
TH
 TR
TR
 MS
MS
 GA
GA
 BE
BE
 HY
HY
 KA
KA
 LO
LO
 LA
LA
 MN
MN
 NE
NE
 SO
SO
 MY
MY
 KK
KK
 UZ
UZ
It’s even more exciting and fun to create awesome objects with 3D printing. But, there can also be little tricky in the time. This guide will tell you everything you need to know to make great prints with your fdm 3d printer. If you follow this simple process then you will be creating beautiful pieces in no time at all.
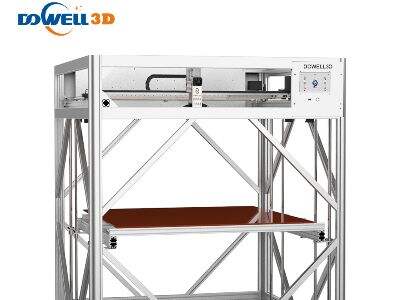
FDM 3D Printing Fundamentals for Great Prints
Here are some key things that you should know about 3D printing before you hit print. Grasping these essentials will give you better results:
Choose the right material. Selecting the proper material for what you are making is terribly important. Different materials are suited for different strengths and usages. For example—if you are creating a toy for children to play a lot, you will want to use a durable material to withstand wear-and-tear. Then your toy can be in perfect shape longer.
Clean the build plate. The build plate is a flat surface where your object will adhere to and so be printed. If there is dirt/dust on the build plate it can interfere with how deeply your print sticks. So, clean it out well, before you go print something. Each time water can easily wash off the build plate, thus leaving your print stick easy.
Level the build plate. The first and foremost the build plate has to be level or flat. Un-level build plate causes uneven prints To see if it’s level, use a ruler or a leveling tool. Get it flat before you start printing; adjust it all you want over to.
Set the right temperature. This means that the temperature of your 3D printer is something you have to be wary of. There are other great materials that require different temperatures to print successfully. Temperature, if too hot, or too cold, may directly lead to unaesthetic prints. Make sure to double-check the recommended temperature for the material you are using and set your printer accordingly.
Steps for Great Prints
With the basics out of the way, let's discuss the key steps you need to take to make impressive prints:
Slice your model. Slicing is the most critical phase. Step two: This process converts your 3D model into a file that the printer can be able to read it. If you don’t slice well, your model might not print as you expected. Ensure your slicing software and settings are correct for optimal results.
Add support structures. Your print sometimes requires added support while it is being printed to remain strong. Support structures prop up sections of your print that would sag or collapse during printing. Add these supports in the correct spots but ensure they do not interfere with your final print.
Print. Once your model is sliced and you’ve added supports, it’s time for the fun part—printing. Hit print and watch your creation build up from the ground, layer by layer. Revolving prototypes:Look at how your design transformed into real object in-front of your eyes.
Tips to Avoid Common Mistakes
3D printing is often a very difficult process, and with these tips, we hope you are able to avoid these common mistakes and receive better results:
Check your first layer. It is very essential for the first layer of your print The base all other components will layer atop. You may need to level your print bed or clean it again if the first layer does not stick or looks messy. A proper print begins with a good first layer.
Use a brim or raft. A brim/raft is an auxiliary layer that makes sure your print does not jump around. It can stop your print when cooling down from bending or getting warped. A brim, raft, or other way to increase stability is an excellent method to try and enhance the stability of the print during the making process.
Let your print cool slowly. Too quick of a cooling process can warp or crack your print. Letting your print cool at a constant rate is paramount. You can turn off the printer’s fan, or leave the print in the printer for a few minutes longer to allow it to cool down slowly.
No Finer Detail: Advanced Tips for Better Prints
Now that you feel confident with the basics of 3D printing, here are some advanced 3D printing techniques that can help you create even higher quality 3D prints:
Change your printing speed. How fast your printer soars makes a tremendous difference. Adjusting your printing speed lower will allow you to receive more detailed, tighter prints. Play with the speed and see what suits works best for your projects.
Adjust your layer height. The quality of your print can also be determined by the height each layer that your printer creates. While thicker layers will print faster, they won’t be as detailed and thinner layers will take longer to print but can provide more detail. Experiment with mix different layer heights to find what may be the best for your individual projects.
Try out different infill densities. Infill density is the amount of material you put inside your object. Using a high density will result in a stronger yet heavier print. By using a low density it will be lighter and may be less strong. Test out different infill densities to see how they impact the strength and weight of your prints.
Add Fun Textures and Details
If you would like your prints to look cooler and more interesting, use these creative approaches:
Use different nozzle sizes. The part of the printer that extrudes the material is called a nozzle. Different sized nozzles can produce different textures and details. Play around with different sizes to get the look you desire, as well as how it modify your prints.
Explore and experiment a variety of slicing software. Well-known slicing software types and their output results vary between different slicing software. Check a variety of ways to discover the one that is the most for you and your printer. Some software even offer features to help make your designs stand out.
Be creative with supports. Support structures don’t all have to be no fun—they can sometimes be fun. Use different shapes and patterns for your supports so you can bring some visual interest to your prints. This can help your final product to look even more unique and exciting.
In Conclusion
Armed with this advice from Dowell 3D, you should be ready to a make some incredible prints on your best fdm 3d printer. As always, continue to practice and experiment with various techniques. Dare to explore and discover, and to make mistakes as necessary. Happy printing, and have fun making things come to life.